NeroNext + LiteSpeed Webserver + LiteSpeed WordPress Plugin = FAST WEBSITES!
The improvement in speed is fantastic and they have more features than any of the other WordPress caching plugins on the market!
Here at NeroNext we run Litespeed web servers! Combined with the LiteSpeed Caching plugin for WordPress you will greatly speed up your website!
Built into the LiteSpeed caching plugin is the option to use Quic.cloud CDN! Our arrangement with Quic.cloud allows you a free allotment of caching features that will additionally decrease the loading time of your website! No worries if you run out! You can either pay for additional resources through Quic.cloud or just wait for the monthly cycle to end and it will start over again!
HOW TO INSTALL LITESPEED WORDPRESS PLUGIN
Please note: This is not an exhaustive tutorial on how to use LiteSpeed Cache plugin. Merely a quick installation guide. You'll need to drill down on the specifics of the different settings to gain full optimization of your account. For the most part, you can use most of the default and recommended settings. While we are pointing out in Step 8 to make sure specific php extensions are enabled for object caching features.
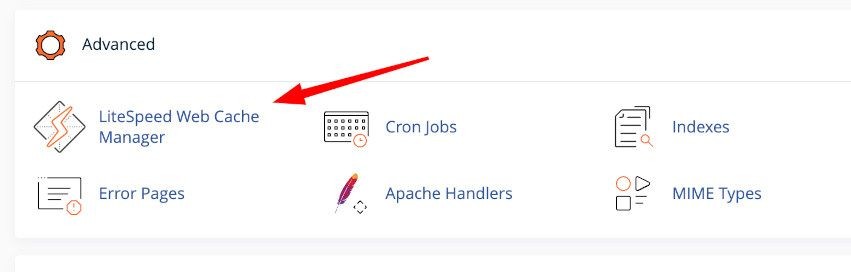
STEP 1: Login to your cPanel and find this icon in the Advanced section.
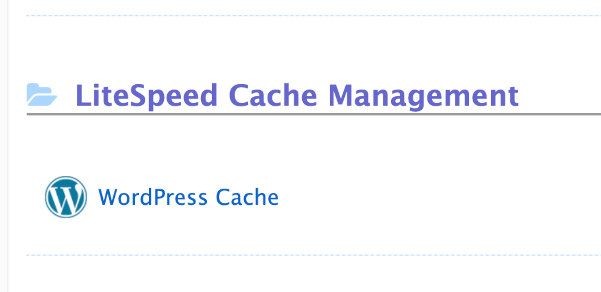
**STEP 2: ** Scroll to the bottom and then click on WordPress Cache.
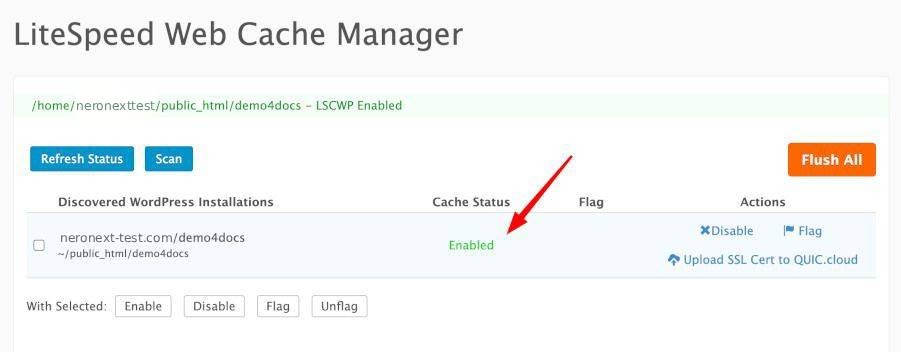
STEP 3: You will need to Scan first for WordPress websites...

STEP 4: After the scan you'll see a success message! and that LSCWP is now Enabled.
STEP 5: Now, login to your WordPress website. You should now see LiteSpeed in the menu. Click on it.

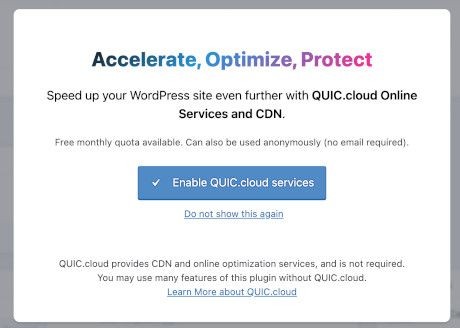
STEP 6: Upon clicking on it, you'll be prompted to setup a Quic.cloud account. You can do that later! For now, click on 'do not show this again'.
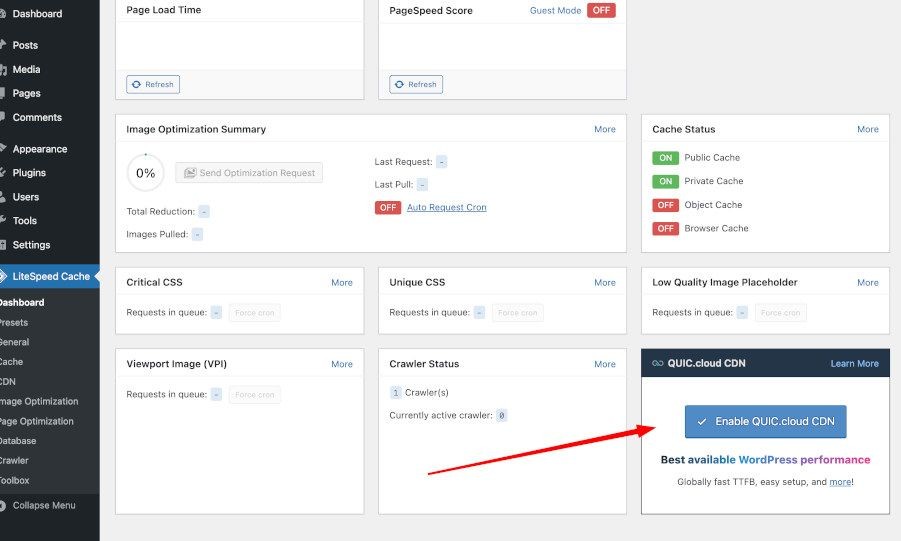
STEP 7: Once you are lin the dashboard, you can see in the bottom right the option to enable Quic.cloud integration in the future!
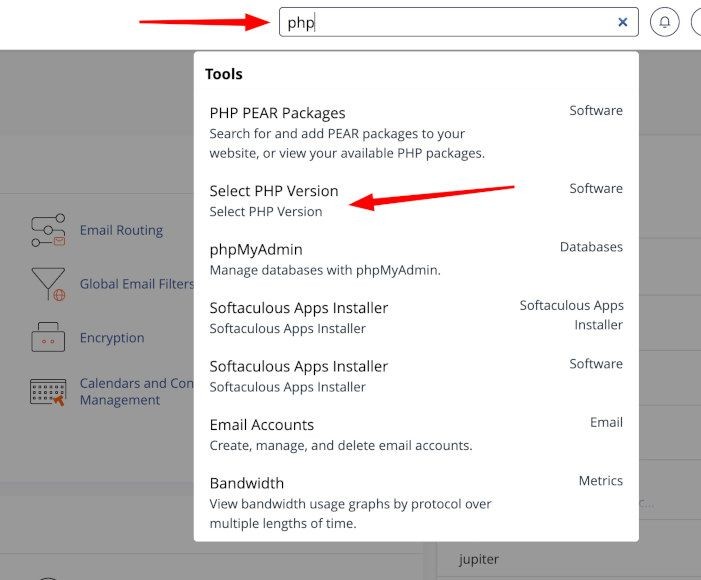
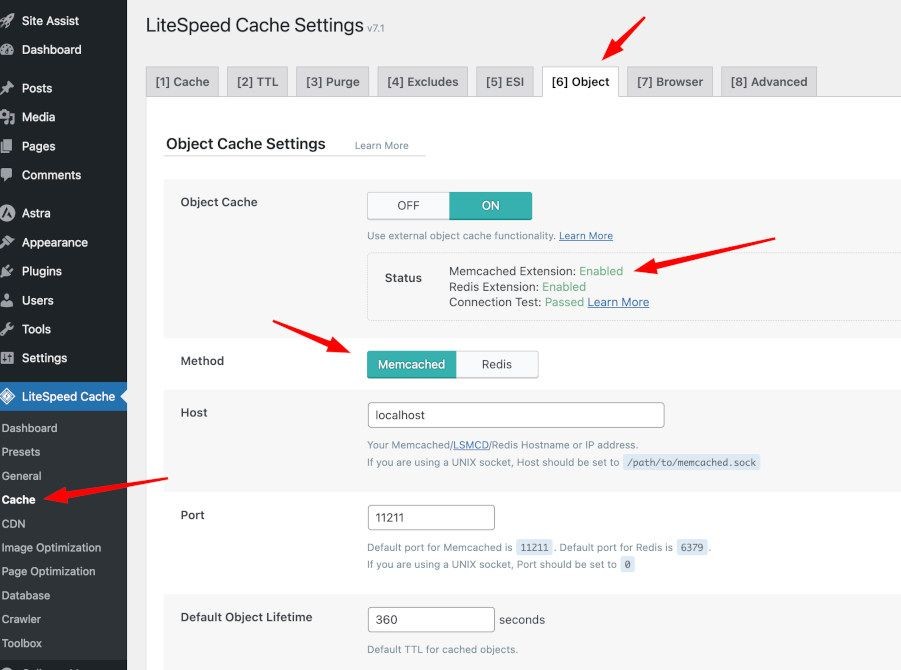
STEP 8: Click on Cache in the LiteSpeed menu, then the Object tab... if you see certain things missing... you may need to install the memcached extension in the php selector in cpanel.

**STEP 9: ** In cPanel, you can quickly find it via the search in the upper right. Search php, then click on the Select PHP Version.
STEP 10: Find the memcache and memcached extensions and make sure they are checked.

STEP 22: Once that is done, if you click away and then come back to that page, it should show green Enabled!
That's pretty much it for LiteSpeed. We do encourage you to explore around and optimize things. This plugin, combined with our LiteSpeed web servers should greatly decrease the loading times of your webpages. After you get things just right, you might even explore the Quic.cloud CDN which will cache and optimize your images even further and serve from the CDN instead of the website!